
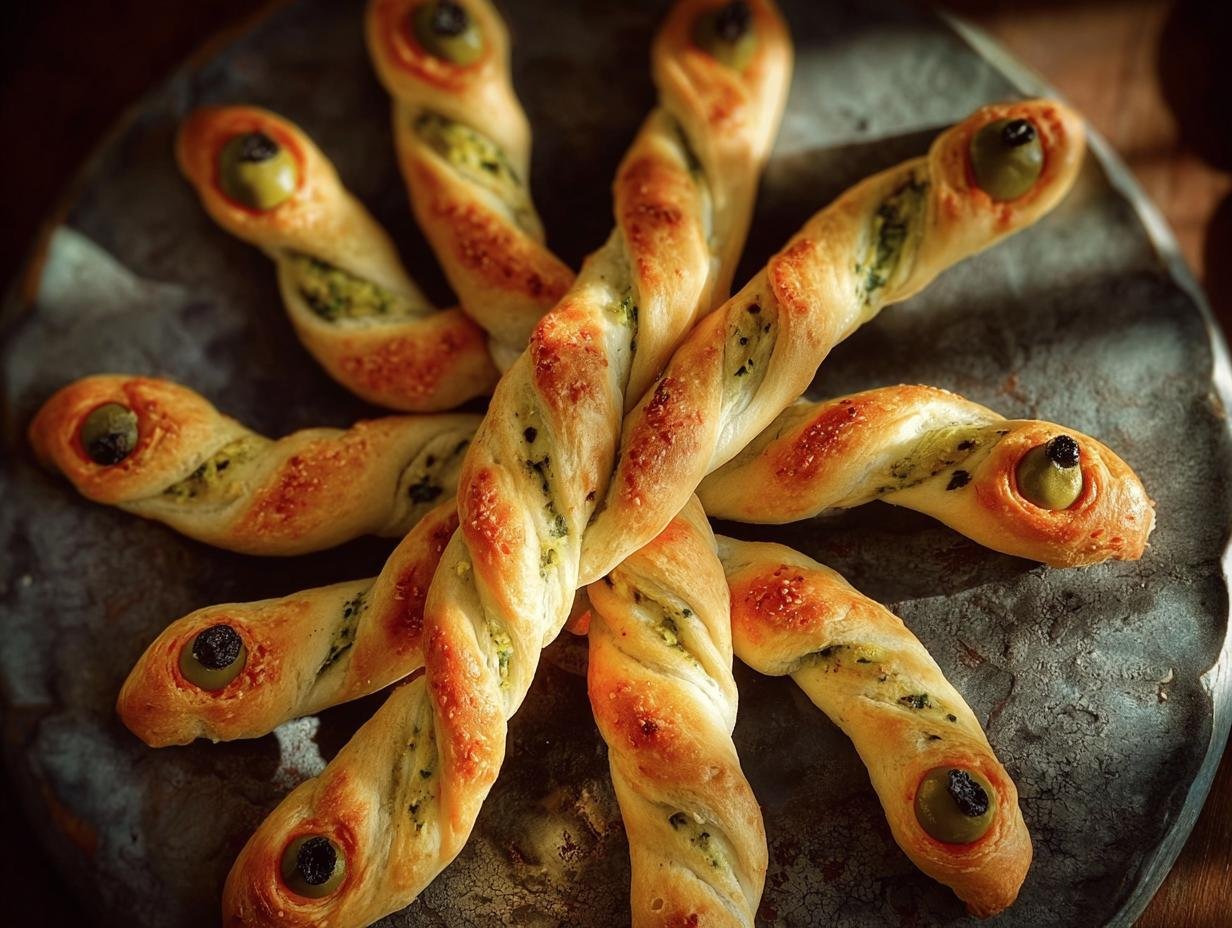
Snake breadsticks have been a secret weapon in my kitchen for years, especially when I want to add a touch of playful magic to any meal. I remember my mom making them for my birthday parties when I was little; the way they twisted and turned on the plate, looking like they were about to slither away, always filled me with delight. The smell of warm, yeasty dough baking, combined with the slightly savory aroma of the sesame seeds, is pure comfort. This easy snake bread recipe is not only incredibly fun to make, but the final result is a guaranteed hit that brings smiles to faces of all ages. It’s truly a fun snake bread recipe that’s perfect for Halloween or just a whimsical snack. Let’s get cooking!
Why You’ll Love This Snake Bread Recipe
Get ready to wow your friends and family with these amazing snake breadsticks! They’re not just adorable; they taste incredible too.
- Deliciously Savory: Crispy on the outside, wonderfully soft and chewy on the inside, these breadsticks are packed with flavor.
- Quick Prep Time: With a total time of just under 2 hours, this is a surprisingly fast way to make homemade bread.
- Healthier Choice: Made with simple ingredients, these breadsticks offer a lighter alternative to many store-bought snacks.
- Budget-Friendly Fun: Using basic pantry staples makes these easy snake breadsticks incredibly affordable to whip up.
- Family Fun: Kids absolutely adore shaping these into snakes, making it a fantastic activity for the whole family.
- Perfect for Parties: They’re a guaranteed hit at any gathering, adding a playful and delicious touch to your spread.
- Kid-Friendly Breadstick Recipe: This recipe is designed to be simple enough for little hands to help create, making it a truly kid-friendly breadstick recipe.
- Versatile Snack: Enjoy them on their own or with your favorite dips for an extra special treat.
Ingredients for Homemade Snake Breadsticks
Gathering your ingredients is the first step to creating these delightful homemade snake breadsticks. You’ll find that most of these are pantry staples, making this snake bread recipe incredibly accessible. The magic happens with simple ingredients that transform into something truly special.
- 1 packet Dried Active Yeast – the leavening agent that makes our dough rise
- 250 ml Warm Water – crucial for activating the yeast (think lukewarm, not hot!)
- 2 tbsp Olive Oil – adds a touch of richness and helps with dough texture
- 500 g Plain Flour – the foundation of our breadsticks
- 1 tsp Salt – balances the flavors and strengthens the gluten
- 50 g Olives (chopped) – for cute little snake eyes
- 1 medium Orange Pepper (bell pepper) – diced finely to create charming snake mouths
- 1 tbsp Extra Strong Food Colour Gel – for vibrant snake skins; choose your favorite spooky shade!
- 2 tbsp Water (for mixing color) – to dilute the food gel for easy brushing
- Sesame or Nigella Seeds (optional) – for a little crunch and visual appeal, like scales
While this recipe doesn’t include cheese, you could absolutely adapt it for cheesy snake breadsticks by adding shredded cheddar or parmesan to the dough! And for an extra flavor kick, consider serving these with a side of garlic snake breadsticks dip.
How to Make Snake Breadsticks
Ready to roll up some fun? Making these snake breadsticks is a blast, and I’ll walk you through every step. This snake bread recipe is designed to be straightforward, even for beginners. We’ll start by bringing our dough to life, then shape it into slithering delights, bake them to golden perfection, and finally add those adorable details.
Preparing the Dough
Step 1: Let’s get our yeast activated! In a small bowl, combine 250 ml warm water with the 1 packet dried active yeast. Give it a gentle stir and let it sit for about 5-10 minutes until it gets foamy and bubbly. This tells us the yeast is alive and ready to work its magic. Once it’s foamy, stir in the 2 tbsp olive oil. In a separate large bowl, sift together 500 g plain flour and 1 tsp salt. Pour the activated yeast mixture into the dry ingredients. Mix everything together with a spoon or your hands until a shaggy dough starts to form. This is the very beginning of our homemade snake breadsticks.

Shaping and Baking the Snakes
Step 2: Turn the dough out onto a lightly floured surface. Now comes the kneading! Work the dough for about 10 minutes until it’s smooth, soft, and elastic. You’ll feel it transform under your hands; it should spring back slowly when pressed. Once kneaded, place the dough in a lightly oiled bowl, cover it with a damp cloth or plastic wrap, and let it rise in a warm spot for about 1 hour, or until it has doubled in size. You’ll see it puff up beautifully! After its first rise, punch down the dough gently.
Step 3: Now for the fun shaping! Divide the dough into 50g pieces. Roll each piece into a long, snake-like shape, about 8-10 inches long, tapering one end for a tail. Place your dough snakes onto a baking tray lined with parchment paper, making sure to leave some space between them as they’ll expand a bit. This is where the how to make snake breadsticks really gets creative!
Step 4: Preheat your oven to 200°C (392°F). Bake the snakes for about 15 minutes, or until they are lightly golden brown and sound hollow when tapped on the bottom. This initial bake sets their shape. This is part of what makes it a quick snake breadsticks recipe.
Decorating Your Snake Breadsticks
Step 5: While the snakes are baking, prepare your decorations. In a small bowl, mix the 1 tbsp extra strong food colour gel with 2 tbsp water until you have a smooth, brushable color. If you’re using them, have your sesame or nigella seeds ready.
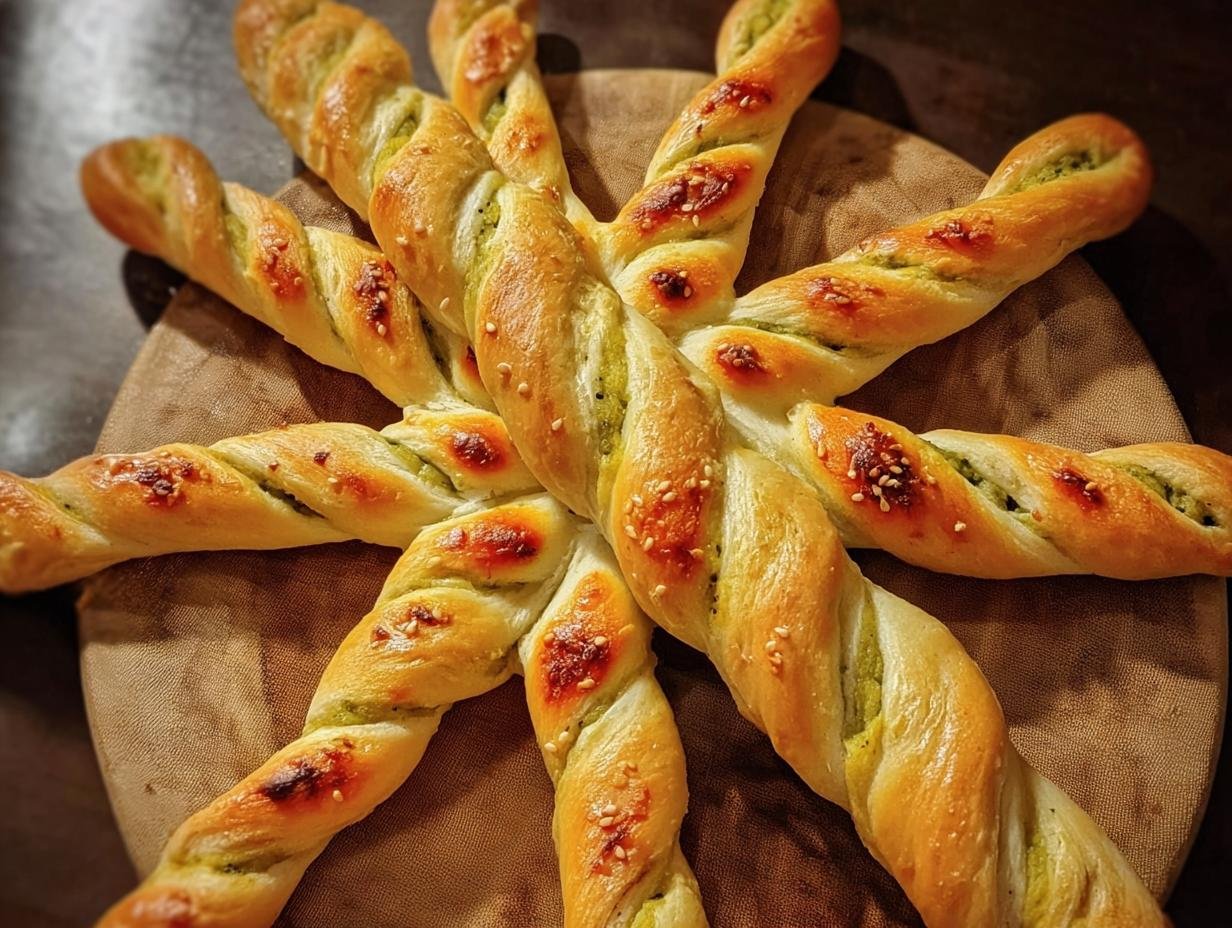
Step 6: Once the snakes have had their first bake and are lightly golden, carefully remove them from the oven. Using a pastry brush, generously paint the food coloring mixture all over the breadsticks. Get creative with patterns if you like! If using, sprinkle the seeds over the colored dough for texture and visual appeal. Return the decorated snakes to the oven for an additional 5 minutes to set the color and finish baking. They’ll look so vibrant!
Adding the Final Touches
Step 7: Let the breadsticks cool on the baking tray for a few minutes before carefully removing the kebab sticks. If any of the sticks seem stuck, gently twist them as you pull to avoid breaking the bread. Once the kebab sticks are out, use a small knife or the end of a chopstick to poke small holes where you want the eyes and mouths to go. Insert the chopped olives for eyes and small pieces of the diced orange pepper for the mouths. These simple additions truly bring your snake breadsticks to life!
Pro Tips for the Best Snake Breadsticks
Want to elevate your snake bread game? These little tricks will help you achieve perfectly shaped, delicious breadsticks every time. Making these homemade snake breadsticks is a joy, and a few key details can make all the difference.
- Always use a kitchen scale for weighing your flour. This ensures consistent dough consistency, which is key for easy shaping and perfect texture.
- Don’t rush the proofing process! Let the dough double in size in a warm, draft-free spot for the best rise and flavor development.
- If your dough feels sticky, resist adding too much extra flour. Instead, try kneading it for a few extra minutes or lightly oiling your hands.
- When removing kebab sticks, twist them gently as you pull to prevent tearing the bread.
What’s the secret to perfect snake breadsticks?
The secret to the best snake breadsticks recipe lies in proper yeast activation and patient proofing. Ensuring your yeast is bubbly and letting the dough rise fully in a warm place creates that wonderfully soft interior and slight chewiness you crave. For more on yeast and baking science, check out this guide to yeast.
Can I make snake breadsticks ahead of time?
Yes! You can shape and proof the dough for these party snake breadsticks up to 24 hours in advance. Cover the shaped snakes and refrigerate. Bake as directed, adding a few extra minutes if baking from cold. They make fantastic snack snake breadsticks ready to go!
How do I avoid common mistakes with snake breadsticks?
Avoid dough that doesn’t rise by ensuring your water is warm (not hot) for the yeast. If snakes break when removing kebab sticks, try using slightly thicker skewers or twisting more gently. For consistent color, mix your food gel thoroughly.
Best Ways to Serve Snake Breadsticks
These fun snake breadsticks are incredibly versatile and can be served in so many ways! They’re fantastic on their own as a playful snack, but they truly shine when paired with complementary flavors. Think of them as a whimsical take on classic breadsticks, perfect for adding a touch of fun to any meal.
For a delightful appetizer, serve them with a trio of dips. A creamy garlic aioli, a zesty BBQ sauce, or even a simple marinara would be delicious. You can also serve these alongside a main course, much like you would serve traditional breadsticks. Their slightly chewy texture and mild flavor make them a great accompaniment to pasta dishes or soups. While they aren’t exactly pretzel snake bread, their satisfying chewiness offers a similar delightful texture. These savory snake breadsticks are sure to be a hit at any gathering!
Nutrition Facts for Snake Breadsticks
Discover the nutritional highlights of these fun snake breadsticks. Each bite is designed to be a delightful, flavorful experience without being too heavy. They’re a fantastic option when you’re looking for a light yet satisfying treat.
- Serving Size: 1 breadstick
- Calories: 150 kcal
- Fat: 3 g
- Saturated Fat: 0.5 g
- Unsaturated Fat: 2 g
- Trans Fat: 0 g
- Carbohydrates: 25 g
- Fiber: 1 g
- Sugar: 1 g
- Protein: 4 g
- Sodium: 200 mg
Nutritional values are estimates and may vary based on specific ingredients used.
How to Store and Reheat Snake Breadsticks
Don’t let your amazing snake breadsticks go to waste! Proper storage is key to keeping these fun treats fresh and delicious. Once they’ve cooled completely on a wire rack—this is super important to prevent sogginess—you can store them in an airtight container. For the best quality, enjoy them within 3-4 days when kept at room temperature. This makes them perfect for planning ahead for party snake breadsticks or as a convenient snack.
If you’ve made a big batch and want to save some for later, these breadsticks freeze beautifully. Wrap individual snakes tightly in plastic wrap, then place them in a freezer-safe bag or container. They’ll keep well in the freezer for up to 3 months. To reheat, simply place the frozen breadsticks on a baking sheet and warm them in a preheated oven at 350°F (175°C) for about 10-15 minutes, or until heated through and slightly crispy. This is a great way to enjoy your leftover snake bread recipe anytime!
Frequently Asked Questions About Snake Breadsticks
What are snake breadsticks and why make them?
Snake breadsticks are a playful and creative take on traditional breadsticks, shaped and decorated to resemble snakes! They’re a fantastic way to add some fun to your meal or party spread. You’ll want to make them because they’re incredibly delicious, with a crispy exterior and a soft, chewy inside. Plus, the decorating process is a blast for all ages, making them a perfect activity for kids and a guaranteed hit at any gathering. They’re a unique and memorable way to serve a simple snack.
Can I make snake breadsticks without food coloring?
Absolutely! While the food coloring adds a vibrant, spooky touch, you can definitely skip it. The breadsticks will still be delicious and fun to eat. If you want a bit of color without the gel, you could try using natural food colorings derived from fruits or vegetables, or simply sprinkle them with herbs like parsley or oregano for a different kind of visual appeal. They’re still wonderfully tasty and a great alternative for those preferring fewer artificial ingredients. For more on natural food coloring, consult a resource like Healthline.
What kind of dips pair well with snake breadsticks?
These snake breadsticks are fantastic with a variety of dips! For a savory option, a creamy garlic aioli or a zesty ranch dip works wonderfully. If you’re leaning towards something a bit richer, a warm marinara sauce or a smoky BBQ dip are excellent choices. They also pair surprisingly well with a mild cheese dip. The mild flavor of the breadsticks makes them a versatile canvas for any of your favorite dipping sauces, enhancing the overall snack experience.
Variations of Snake Breadsticks You Can Try
Looking to mix things up or cater to different tastes? These snake breadsticks are wonderfully versatile! You can easily adapt this recipe to create exciting new versions that are perfect for any occasion, from a casual snack to a themed party.
- Cheesy Delight: For irresistible cheesy snake breadsticks, simply add about 1/2 cup of shredded cheddar or Parmesan cheese directly into the dough mixture during the kneading stage. The cheese melts beautifully and adds a wonderful savory depth.
- Whole Wheat Wonders: Substitute half of the plain flour with whole wheat flour for a nuttier flavor and added fiber. The dough might be slightly denser, so ensure you give it adequate rising time.
- Garlic Herb Twists: Infuse your breadsticks with flavor by adding minced garlic and dried herbs like rosemary or Italian seasoning to the dough. You can also brush them with melted garlic butter after baking for an extra punch, creating delicious garlic snake breadsticks.
- Mini Snake Bites: Make smaller versions of these breadsticks for perfect little appetizers. These mini kids snake breadsticks are ideal for little hands and make for fantastic finger food at parties, easily transforming into fun appetizer breadsticks.

Snake Breadsticks: 1 AMAZING Kid-Friendly Recipe
- Total Time: 1 hour 40 minutes
- Yield: 8 breadsticks 1x
- Diet: Vegetarian
Description
Create fun and spooky Halloween Snake Breadsticks that are crispy on the outside and soft on the inside. This easy recipe is perfect for kids and adults, making them a hit at parties.
Ingredients
- For the Dough:
- 1 packet Dried Active Yeast
- 250 ml Warm Water
- 2 tbsp Olive Oil
- 500 g Plain Flour
- 1 tsp Salt
- For the Decoration:
- 50 g Olives (chopped)
- 1 medium Orange Pepper (bell pepper)
- 1 tbsp Extra Strong Food Colour Gel
- 2 tbsp Water (for mixing color)
- Sesame or Nigella Seeds (optional)
Instructions
- Prepare Dough: Mix warm water and dried active yeast. Let it bubble for 5-10 minutes, then stir in olive oil.
- Combine Dry Ingredients: Sift plain flour and mix in salt.
- Knead Dough: Combine wet and dry ingredients. Knead for about 10 minutes until smooth and elastic.
- Proof Dough: Cover the bowl and let the dough rise in a warm spot for about 1 hour, or until doubled in size.
- Shape Snakes: Divide dough into 50g pieces, roll into snake shapes, and place on kebab sticks on a lined baking tray.
- Bake First Phase: Preheat oven to 200°C (392°F). Bake snakes for 15 minutes until lightly golden brown.
- Color Snakes: Mix food coloring with water. Brush over snakes and sprinkle with seeds if using.
- Final Bake: Return decorated snakes to the oven for an additional 5 minutes.
- Decorate: Once cooled, remove kebab sticks. Poke holes for eyes and mouths and insert olives and orange pepper.
Notes
- Serve with garlic mayo or BBQ sauce for extra flavor.
- Ensure water for yeast is warm, not hot.
- Leave space between snakes on the baking tray for expansion.
- Twist gently when removing kebab sticks to prevent breaking.
- Experiment with different food coloring shades.
- Prep Time: 20 minutes
- Cook Time: 20 minutes
- Category: Baking
- Method: Baking
- Cuisine: American
Nutrition
- Serving Size: 1 breadstick
- Calories: 150 kcal
- Sugar: 1 g
- Sodium: 200 mg
- Fat: 3 g
- Saturated Fat: 0.5 g
- Unsaturated Fat: 2 g
- Trans Fat: 0 g
- Carbohydrates: 25 g
- Fiber: 1 g
- Protein: 4 g
- Cholesterol: 0 mg




Leave a Reply